

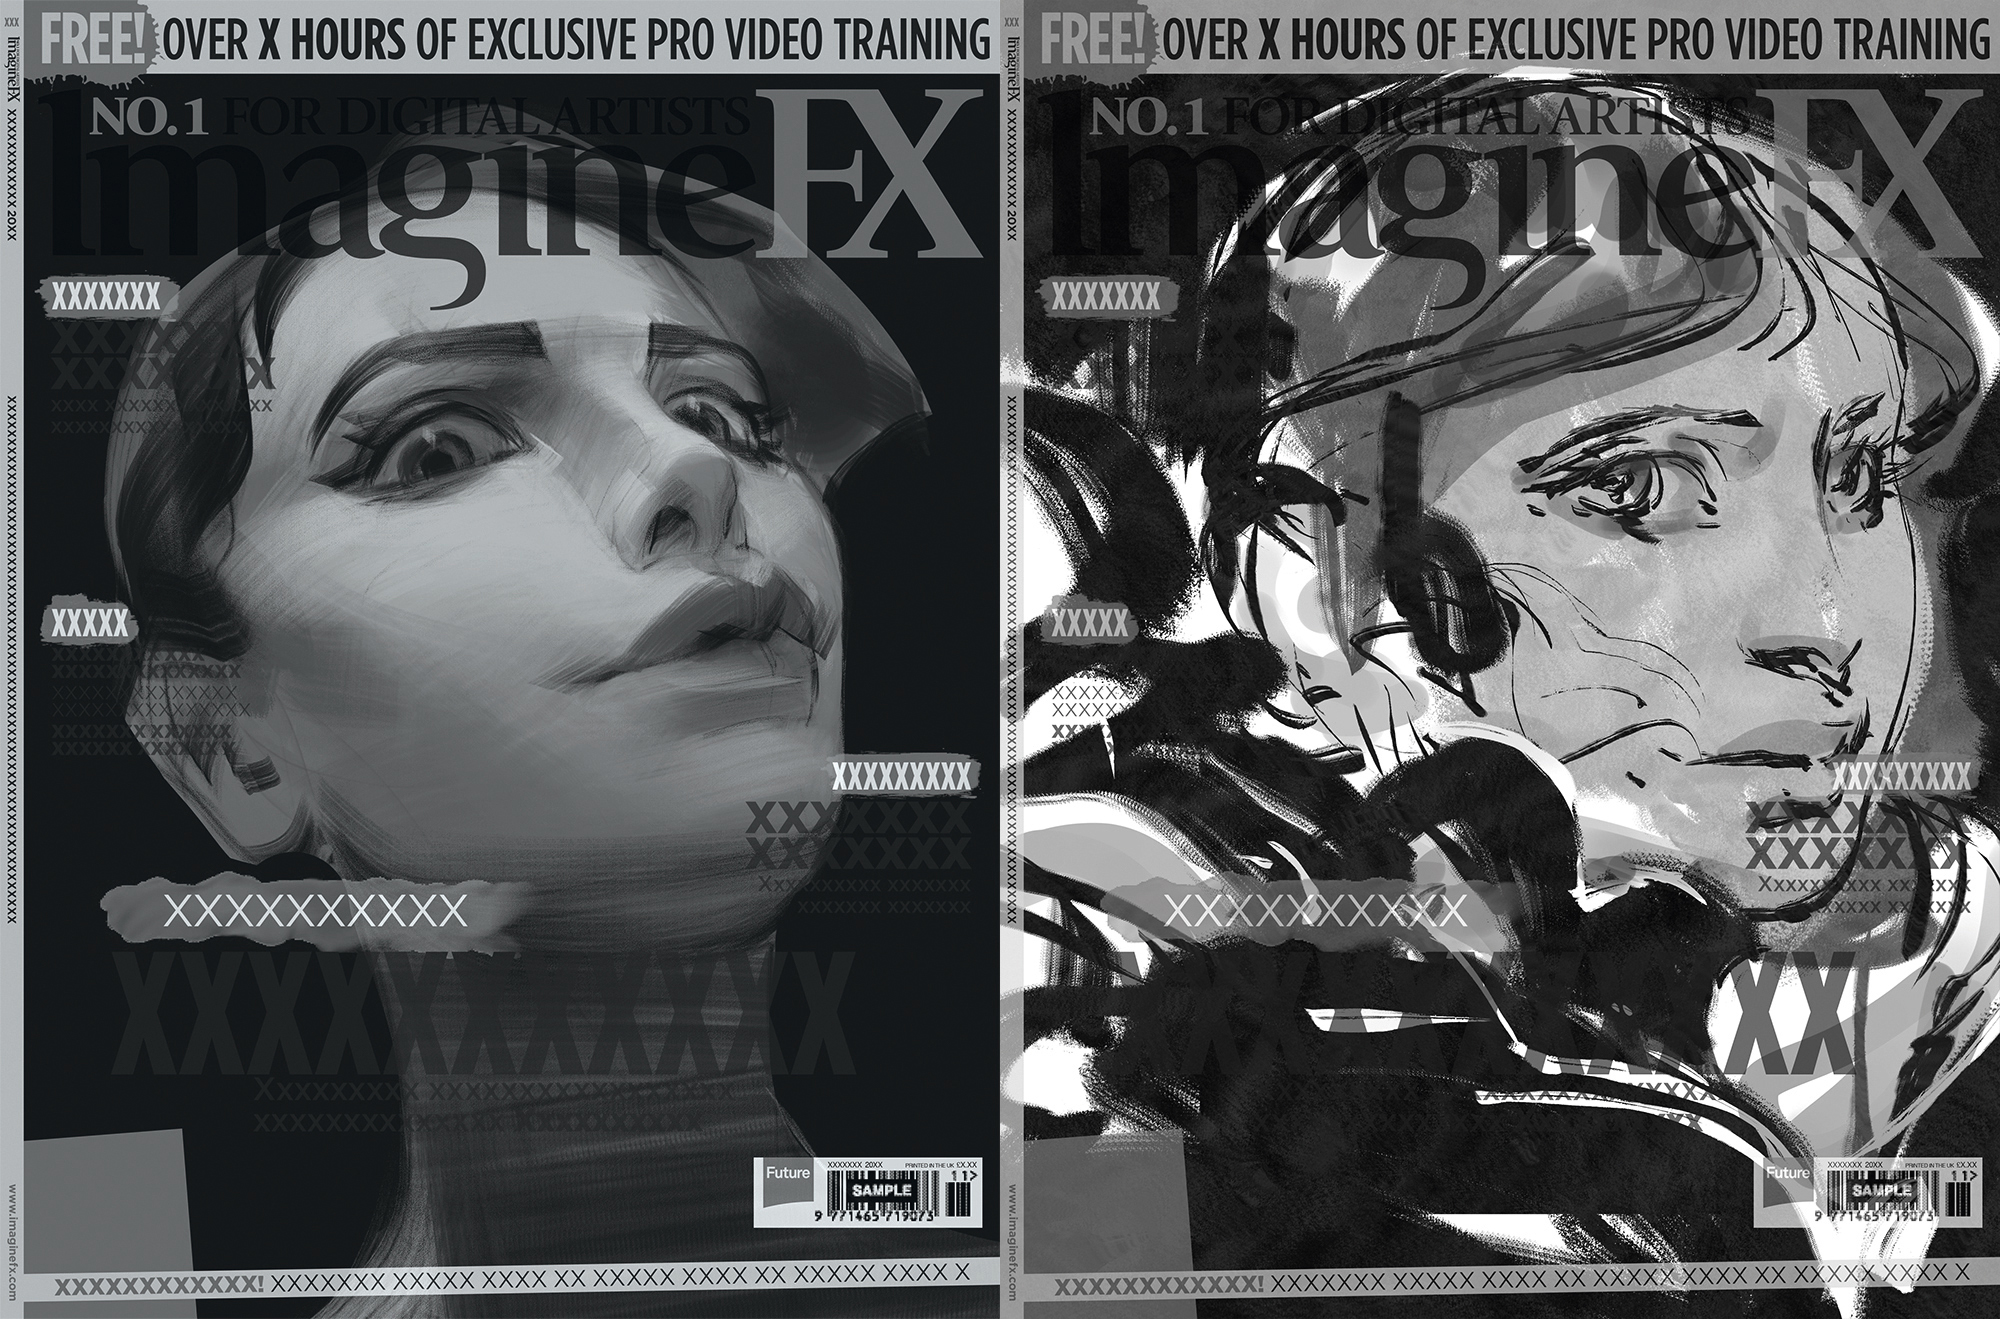
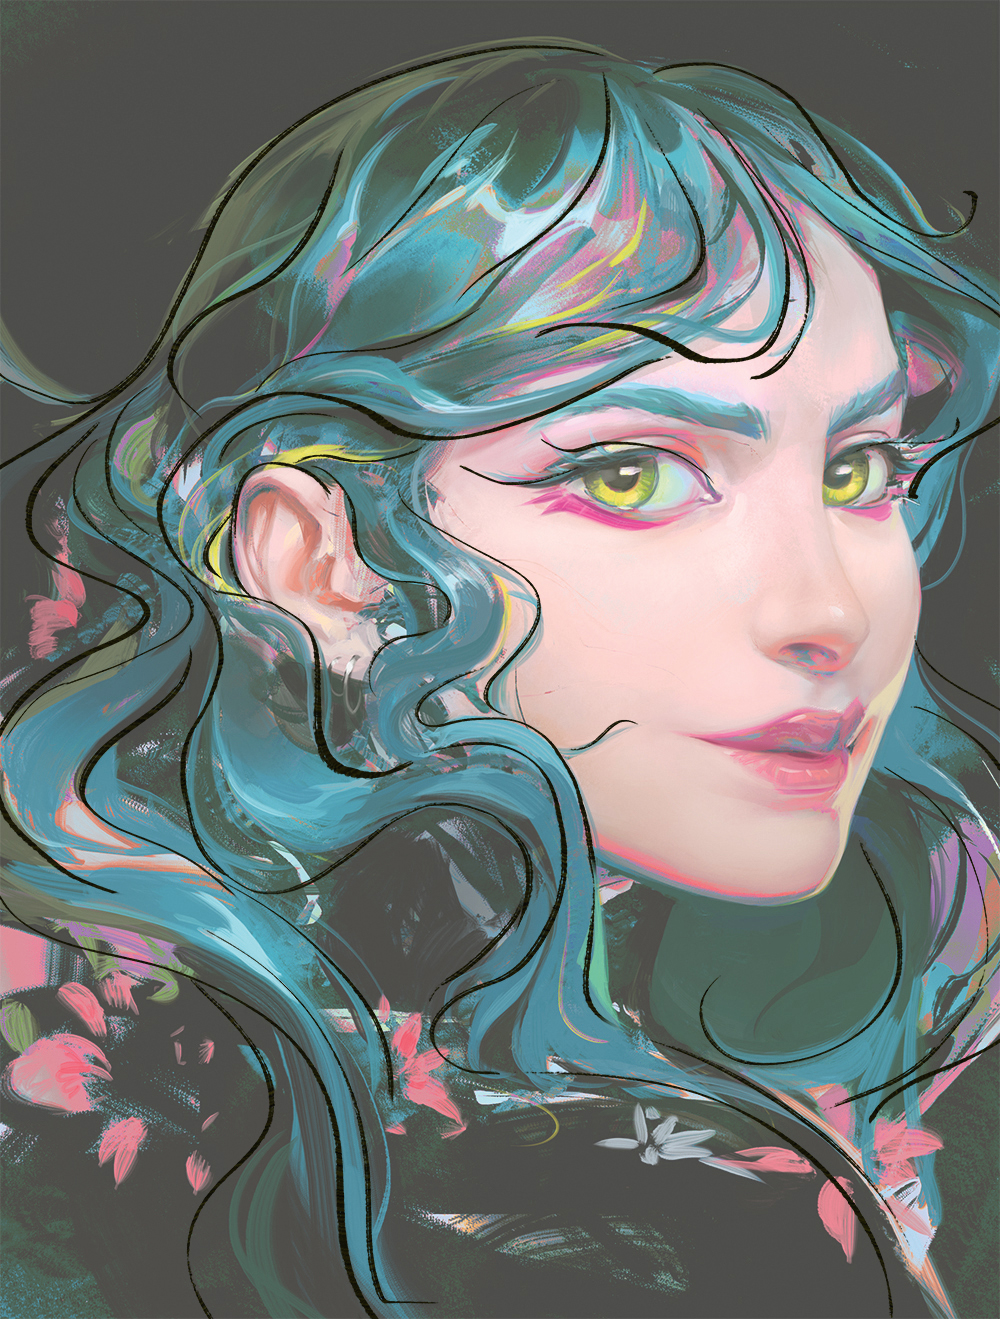
Paint with Photoshop – create a beautiful digital art portrait - rivasyountwo
Experimenting with how to paint with Photoshop has always been a mission for illustrator Ayran Oberto. The idea for the art here is to paint a female portrait but with a sense of stochasticity; one that embraces mistakes. Oberto's lines, which atomic number 2 admits are "always flawed", tend to produce features the artist considers particularly attractive: thick lips, large eyes with long eyelashes, small pointed noses and fuzz that flows in all directions.
In this tutorial Oberto broadly covers his process, if you want to try and emulate what he's doing you can download Photoshop and follow along. There are unfreeze Photoshop brushes to download and prove for yourself, too.
This instructor volition cover Oberto's general workflow. He'll divvy up how he creates different sketches to discover one to proceed with; during this stage what's foremost in Oberto's judgement is to avoid draftsmanship the same angle. He looks for natural angles of the head that would allow for a logical movement of the fibre's eyes towards the viewer.
Once the study with the strongest theme is elect, Oberto aims to contribute IT maximum ocular encroachment victimization colour. His approach during this stage is to create a sense of noise using a range of Photoshop tools. Helium combines effects that on first viewing appear like mistakes, but with a trifle visual modality can end in the lead having potential towards the destruction of the painting process.
Once the colors are finalised, Oberto shows how he spends time discovering the image, using design rules that enable him to reveal attractive shapes in each area that are gradually refined as the house painting progresses.
Watch Ayran Oberto's Photoshop process hither…
Now, read on to light upon how Ayran Oberto creates his aesthetical Photoshop art in his words…
01. Sketch the ideas
(Image: © Ayran Oberto)
IT all starts with the sketch. A few key out run-in spark ideas and service me write this workshop. My propose is to produce assorted angles of a female capitulum using my modality and strong retentivity, and give the viewer the sensation that they're being observed.
02. Wrap lines over my sketches
(Image: © Ayran Oberto)
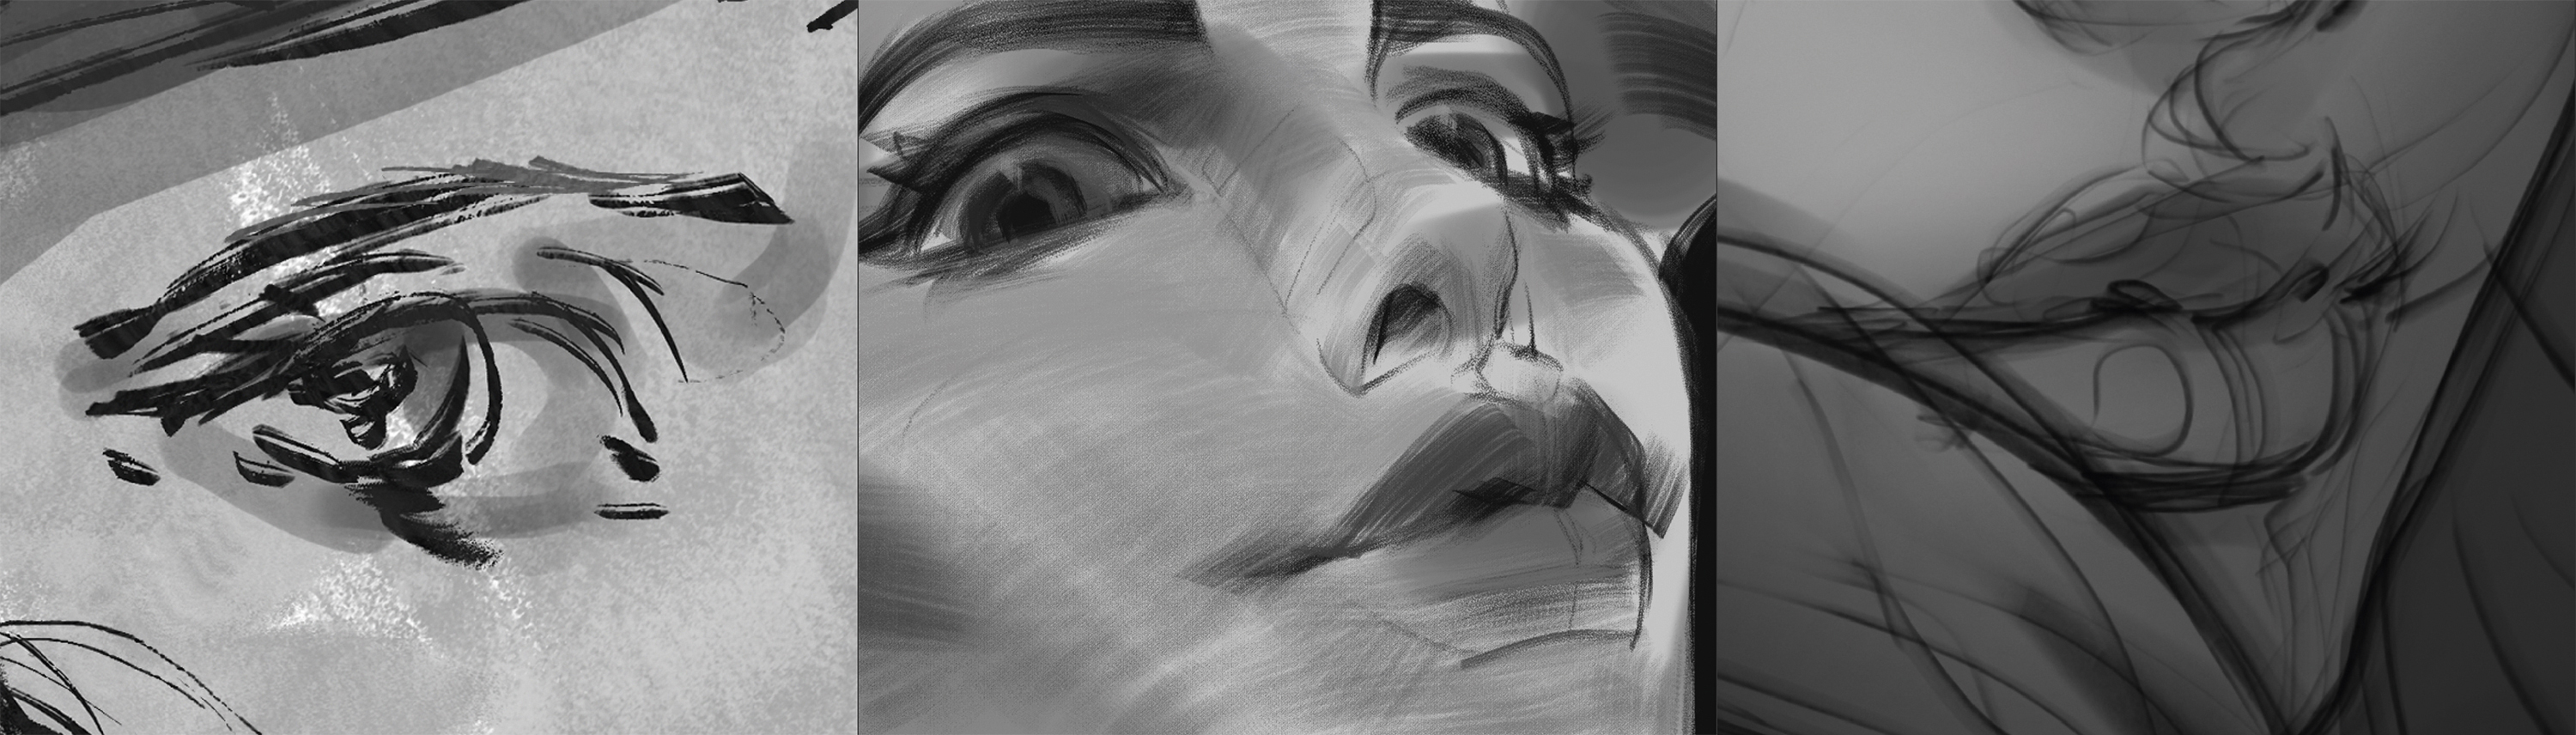
As I work at the sketches, I produce geometric shapes exploitation lines that look to surround them. I need to visually feel the shapes and how they commute direction, which is dictated aside the generalised angle of the face. With these geometries I attempt to create features that draw i me – the thick lips, refined nose and large eyes that I mentioned in the beginning.
03. Find the light spots
(Image: © Ayran Oberto)
To create the lighting scheme I think that the ideal approach is to nerve centre the light so that all the characteristics of the face can be appreciated in detail. I don't want the face to become lost in phantom. To heighten the silhouette a little more, I draw a forward bioluminescent that gently brushes the edge of the face.
04. Work shadows everyplace
(Image: © Ayran Oberto)
With the light already established I have an theme of how to spook, as a result of using a more central light source. I focal point on creating form shadows along all the geometric shapes. United feature of the central light is that it doesn't create large shadow projections, resulting in smooth transitions across the entire face.
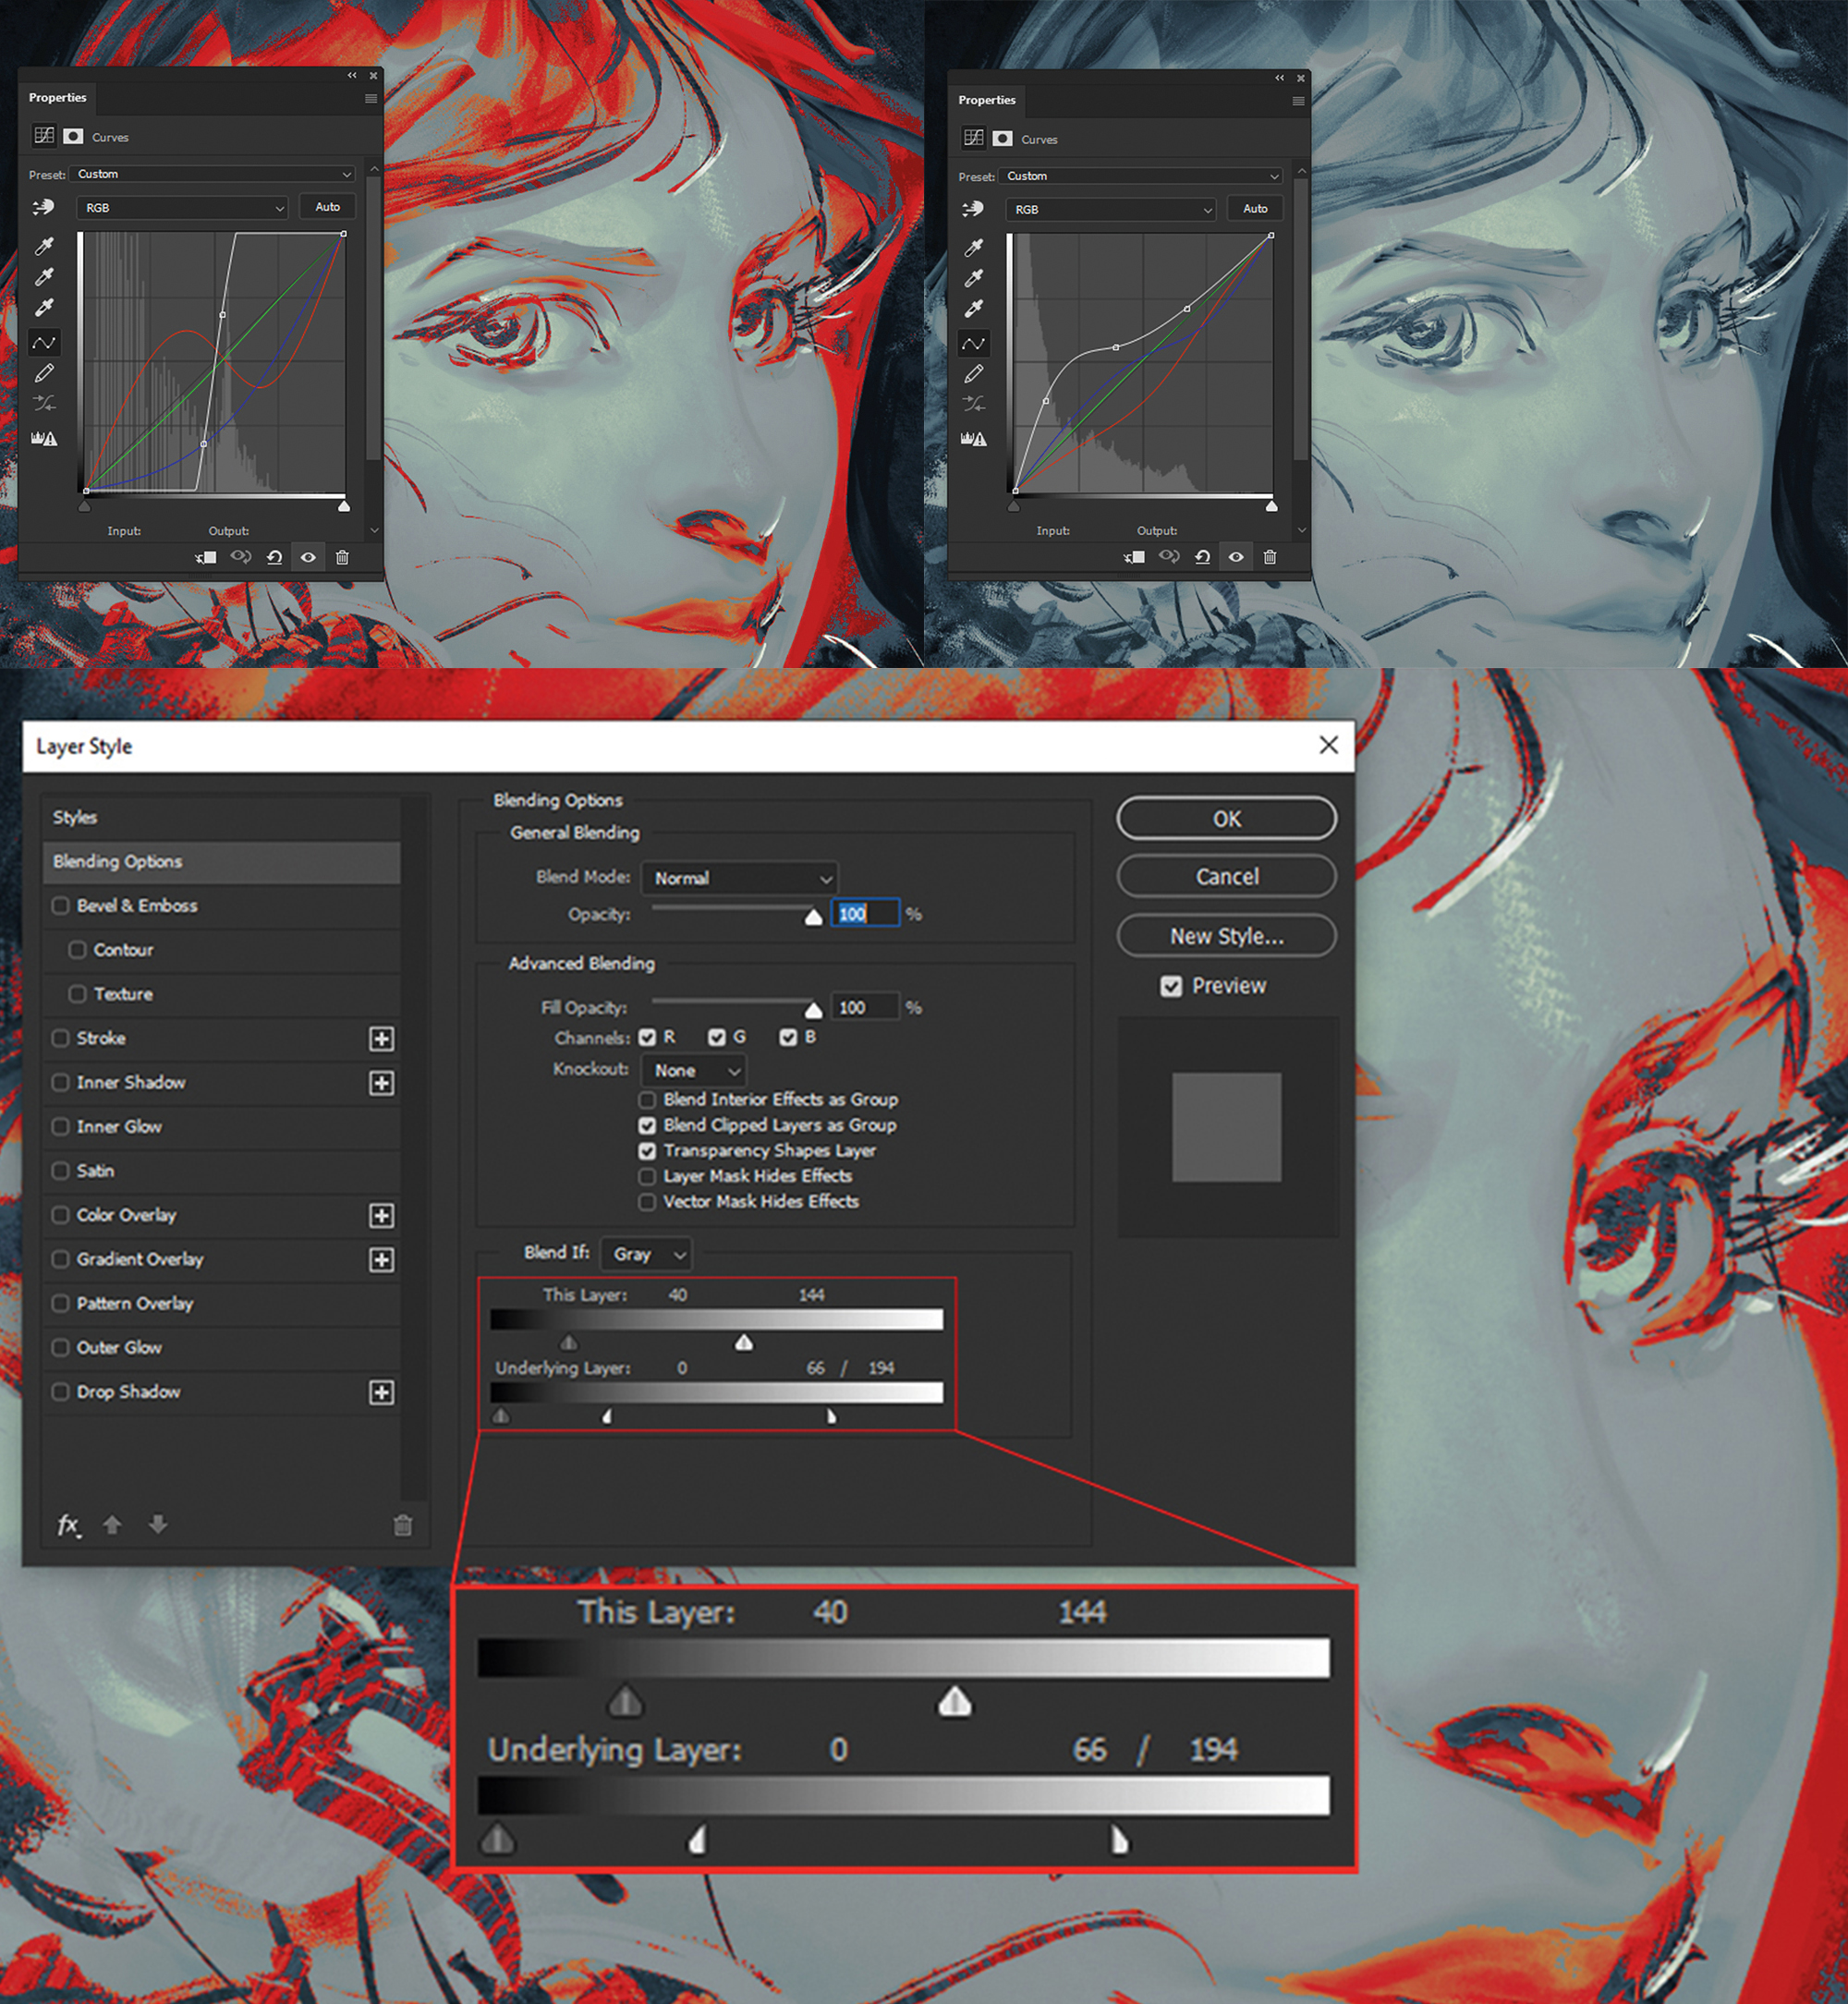
05. Explore the colourise options
(Image: © Ayran Oberto)
For this step I die out to Layer>New Adaption Layer>Curves. I switch between channels exploitation Alt+2, Alt+3, Alt+4 and Alt+5, and move the curve as I please, which creates colour breaks. Next, I double-click this Adjustment layer to determine how much it blends with the nonpareil to a lower place in the Bed mode>Blending options card.
06. Create a variety of colors

(Image: © Ayran Oberto)
I focus on identifying the potential of all of the results from the previous step. Using the Color Picker, I prize the colors that emerged and bring them to other areas of the face by applying brush strokes and taking each of the options in slightly different directions.
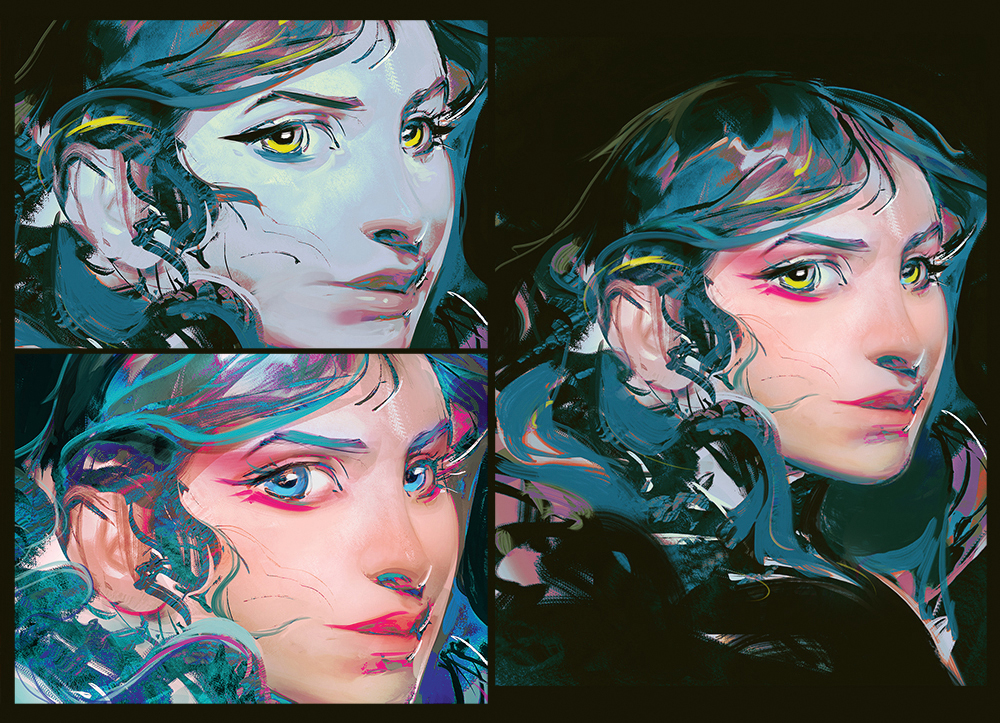
07. Combine the ideas
(Image: © Ayran Oberto)
The art editor likes two colour options: single with a yellowish-dispirited palette and the other one with a more saturated shinny tone. I property the saturated option on a layer beneath the other option and erase the face of the layer on top. This reveals the wet face and achieves the best combination of the cardinal options.
08. Permit the gamy begin
(Persona: © Ayran Oberto)
The coloring option has already been approved and I'm still aware that on that point are many errors that I must correct to bring off the image to its maximum expression. The most unenviable stage has been overcome and now I can start jumping in entirely directions. I fix and kick in definition to all the chaos that's still ubiquitous in the visualize.
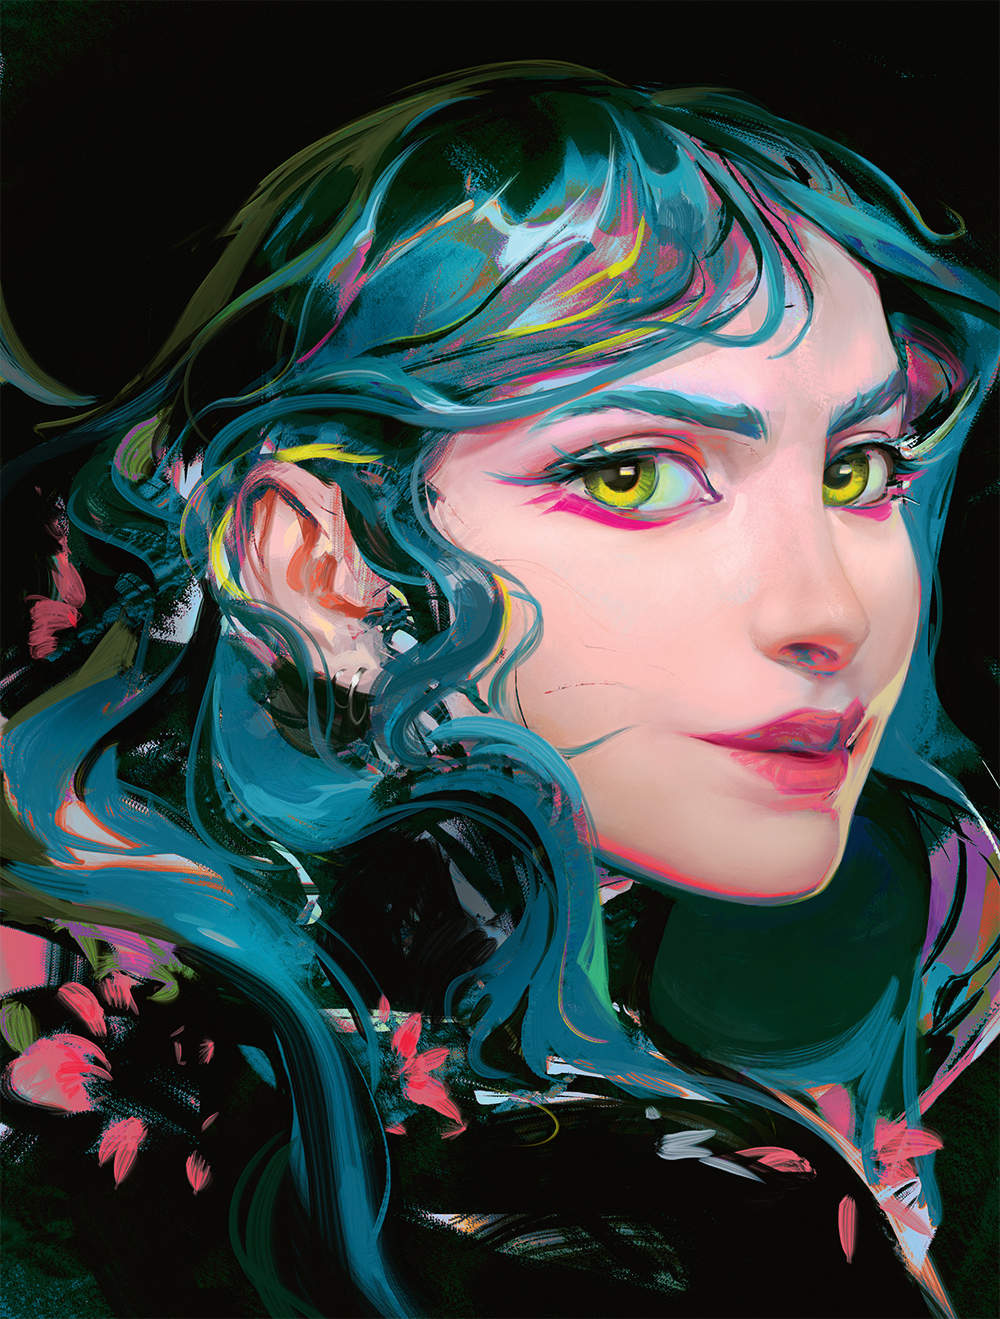
09. Contrast and duality

(Effigy: © Ayran Oberto)
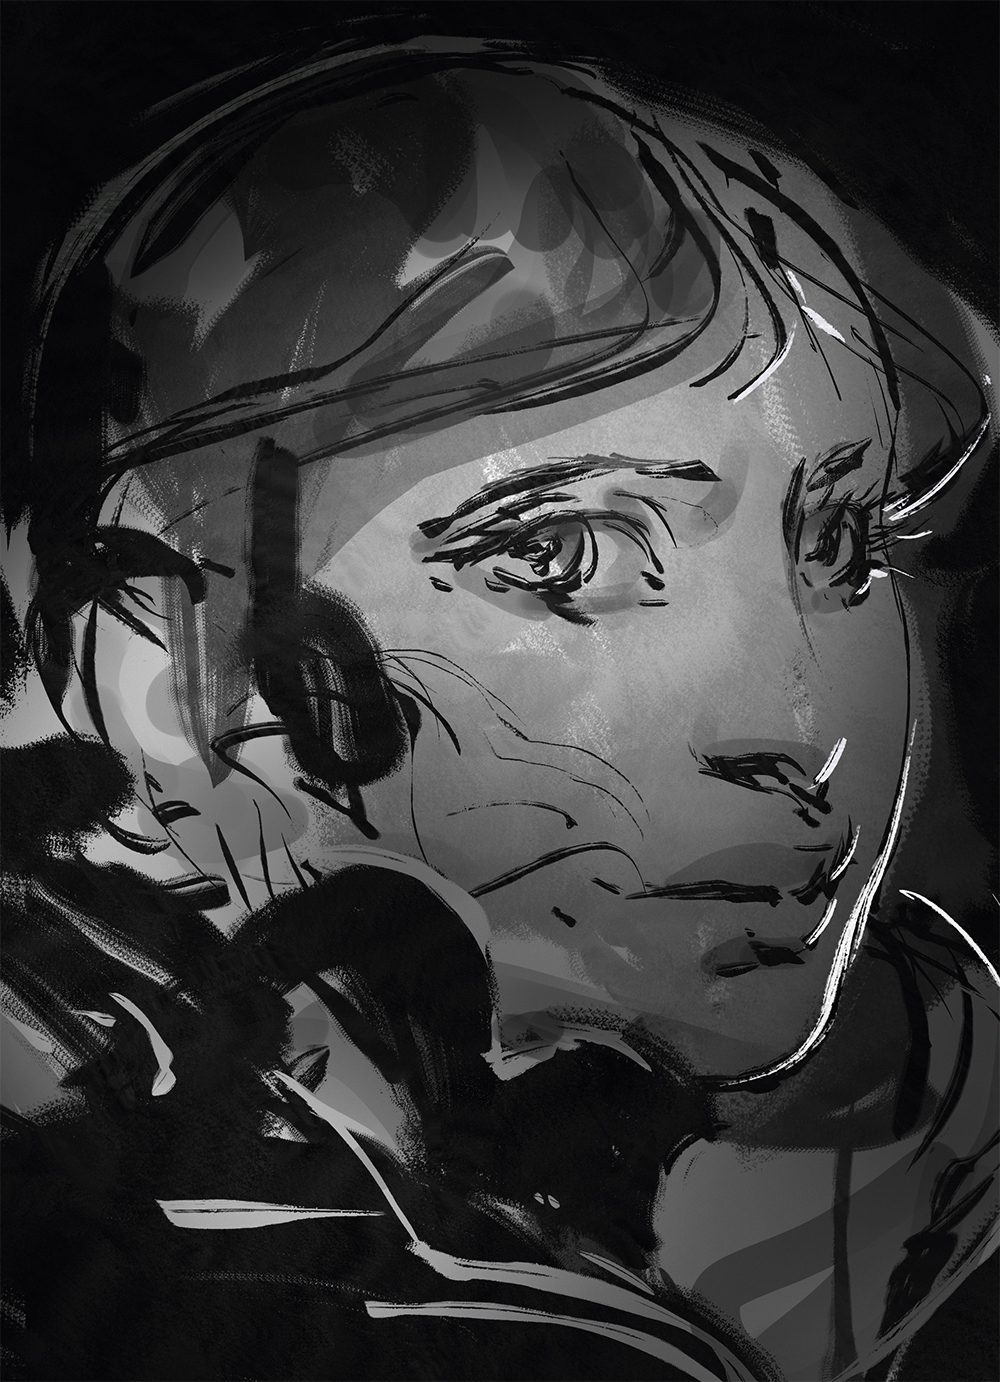
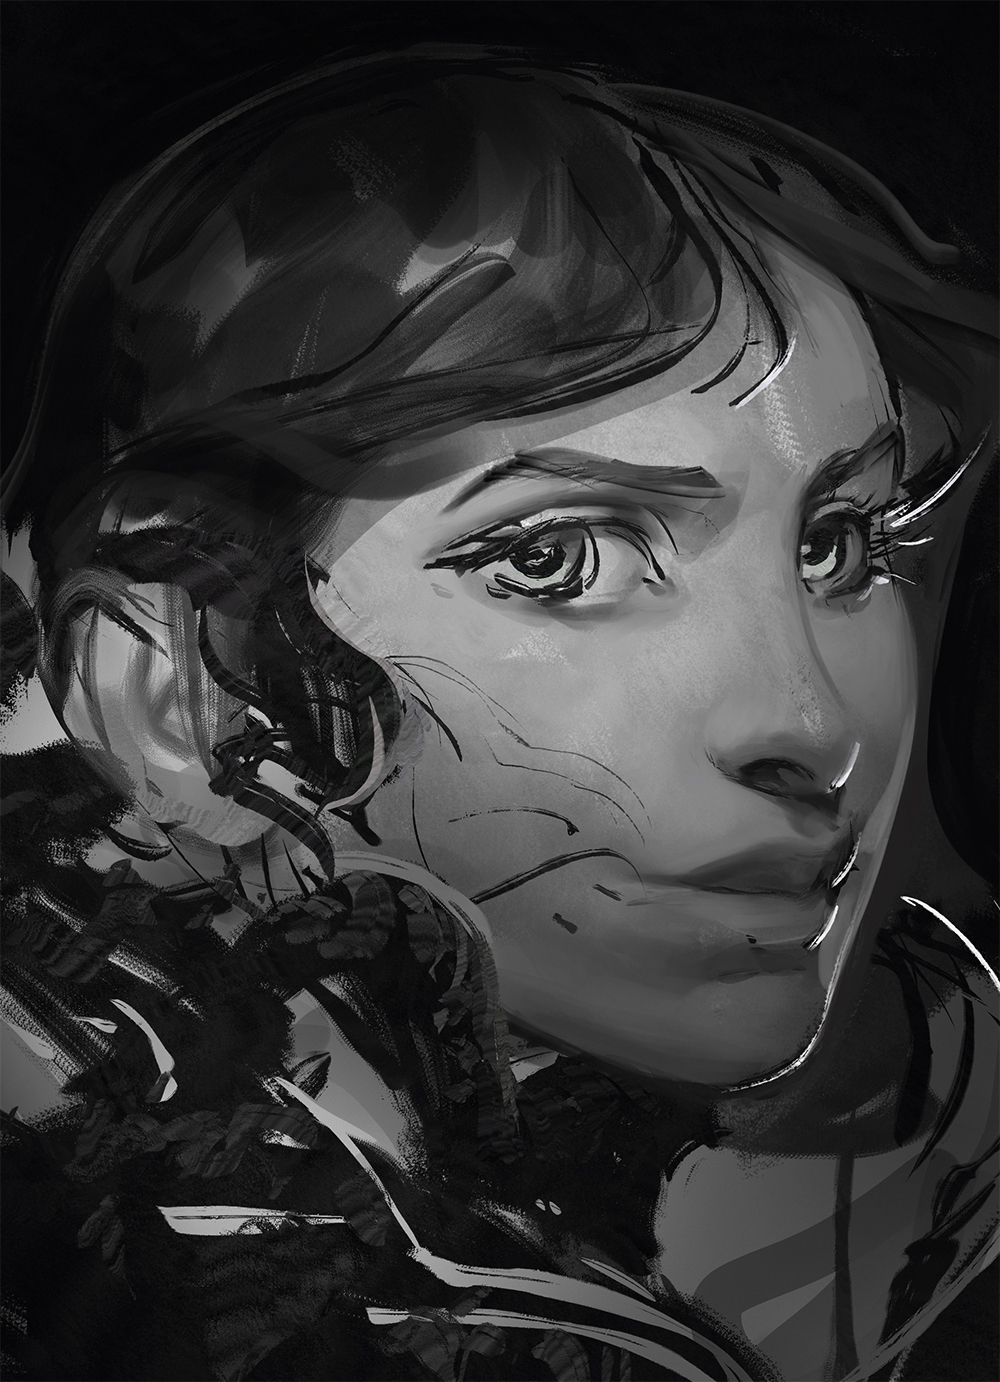
To balance the project I need to conceive in terms of contrast, which extends to more concepts than just valuate contrast. My intention is to create very much of life and information in the hair so that the bad condition of the face stands out more. In addition, the eye of the watcher will naturally examine to settle on these areas.
10. Break-dance down the big parts
(Image: © Ayran Oberto)
The sketch is the disk of a very general idea and each element of the portrait itself is a simple one. Much like a rendering locomotive that subdivides agglomerated pixels to increase definition, I decide to wear off all those elements into small ones. This will increase the feeling of high definition within the illustration.
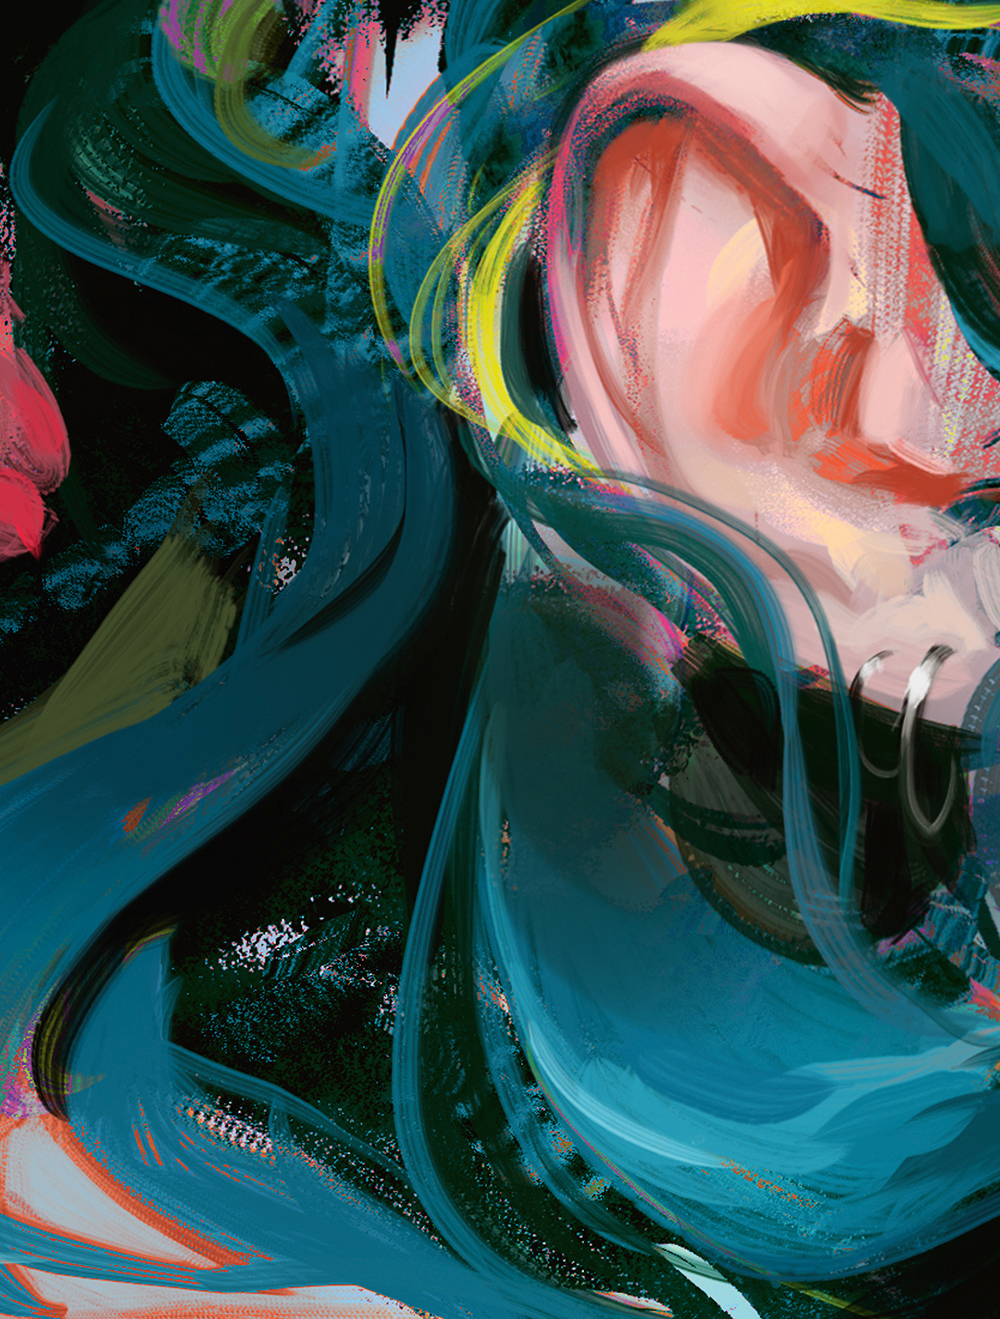
11. Everything flows
(Image: © Ayran Oberto)
I use the Liquify tool to correct elements that have already been fastidious. I go by them while checking the thumbnail to achieve a more coherent positioning of the facial features and hair. For this I attend Filter>Liquify, click the Forward Warp Tool along the leftish-hand panel and promote the forms as required.
12. Liquify without self-reproach
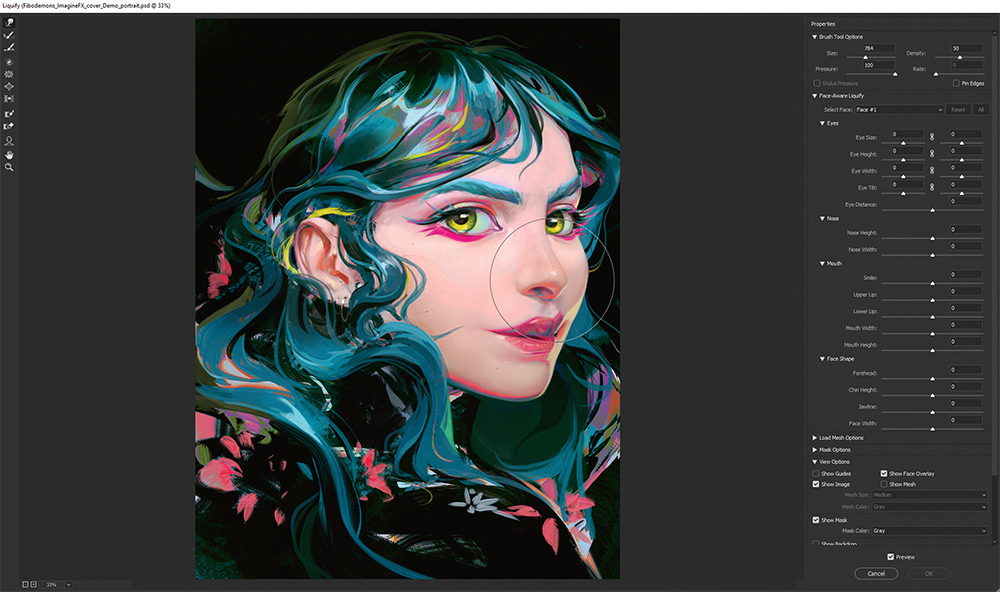
(Image: © Ayran Oberto)
I use the Liquify tool to correct elements that have already been refined. I move them while checking the thumbnail to reach a more logical positioning of the seventh cranial nerve features and hair. For this I break down to Filter>Liquify, click the Forward Warp Tool happening the left-handed panel and agitate the forms as needed.
13. Pick away the highlights
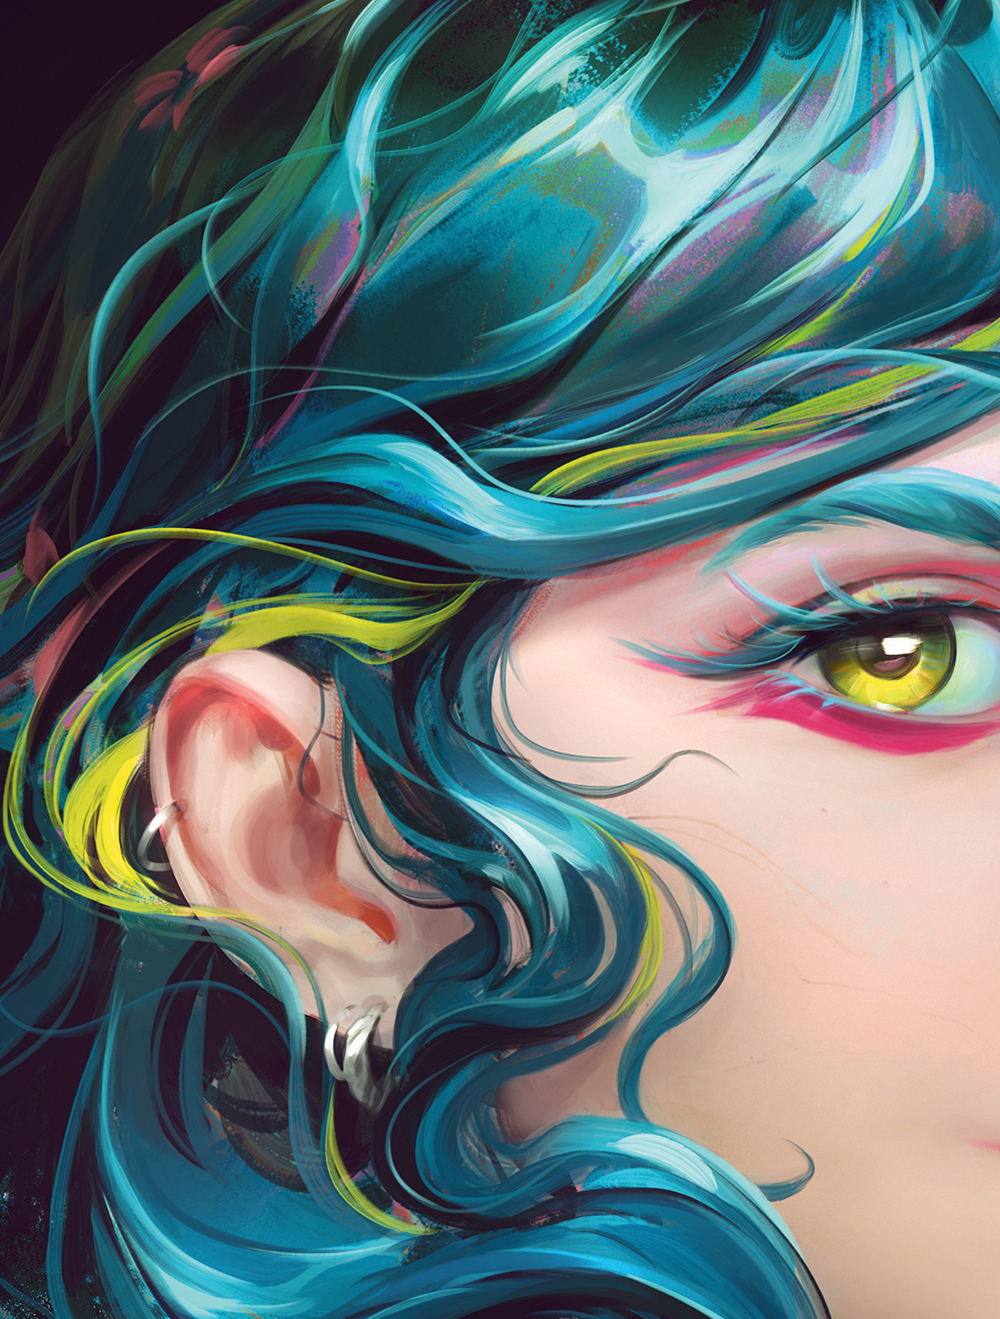
(Image: © Ayran Oberto)
To give a final touch to the image, I create a refreshing layer and bent the Blend mode to Color Parry. Past I apply same murmurous strokes with a neutral, desaturated colour over the highlights with the Soft Airbrush from my customized brushes assembling, slimly increasing the unreal magic tone and timber of the light.
14. Relinquish the representative
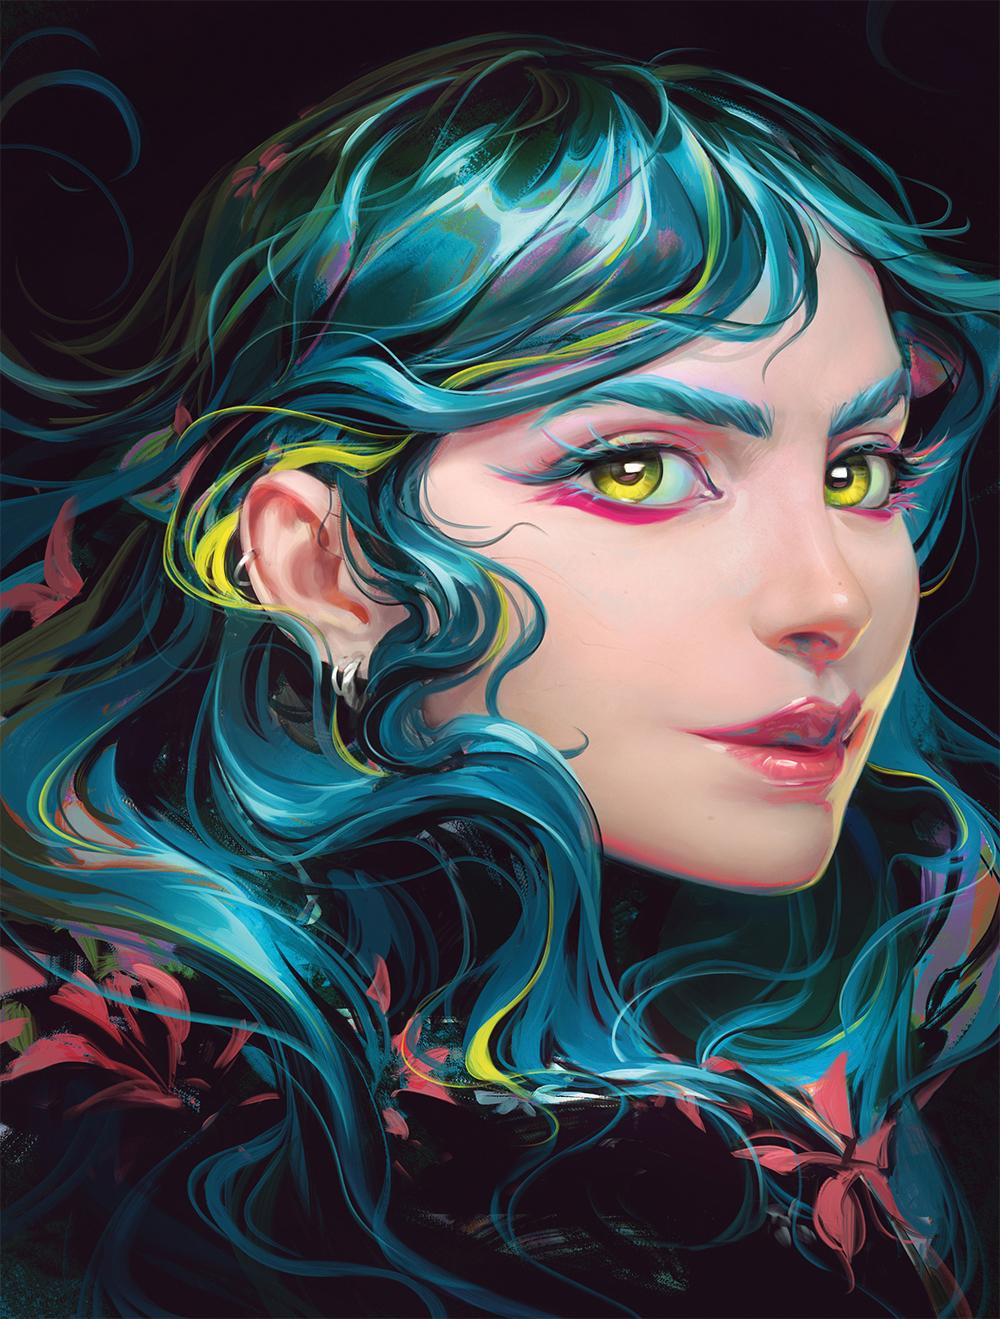
(Pictur: © Ayran Oberto)
I can't deny that all the work I do for clients increases my nervousness, and that as a consequence I breakthrough it difficult to know when to stop adding inside information. If I can't control myself at this stage, I may cease astir destroying the image. The solution is to draw on my experiences, get off the Indian file atomic number 3 finished and wait for feedback.
This clause originally appeared in ImagineFX, the universe's better-selling magazine for extremity artists. Pledge here.
Related articles:
- Download these unpaid photoshop actions
- Our best/independent Photoshop brushes
- Discover the best digital art software
Source: https://www.creativebloq.com/how-to/paint-with-photoshop
Posted by: rivasyountwo.blogspot.com
0 Response to "Paint with Photoshop – create a beautiful digital art portrait - rivasyountwo"
Post a Comment